Microsoft Azure
Connecting to a FHIR server on Azure is easy once you’ve configured access in Azure. The first thing you need to do is configure a registered client application to access the FHIR service and acquire the application’s client registration ID and client registration secret. These values are used by Vanya to get a bearer token.
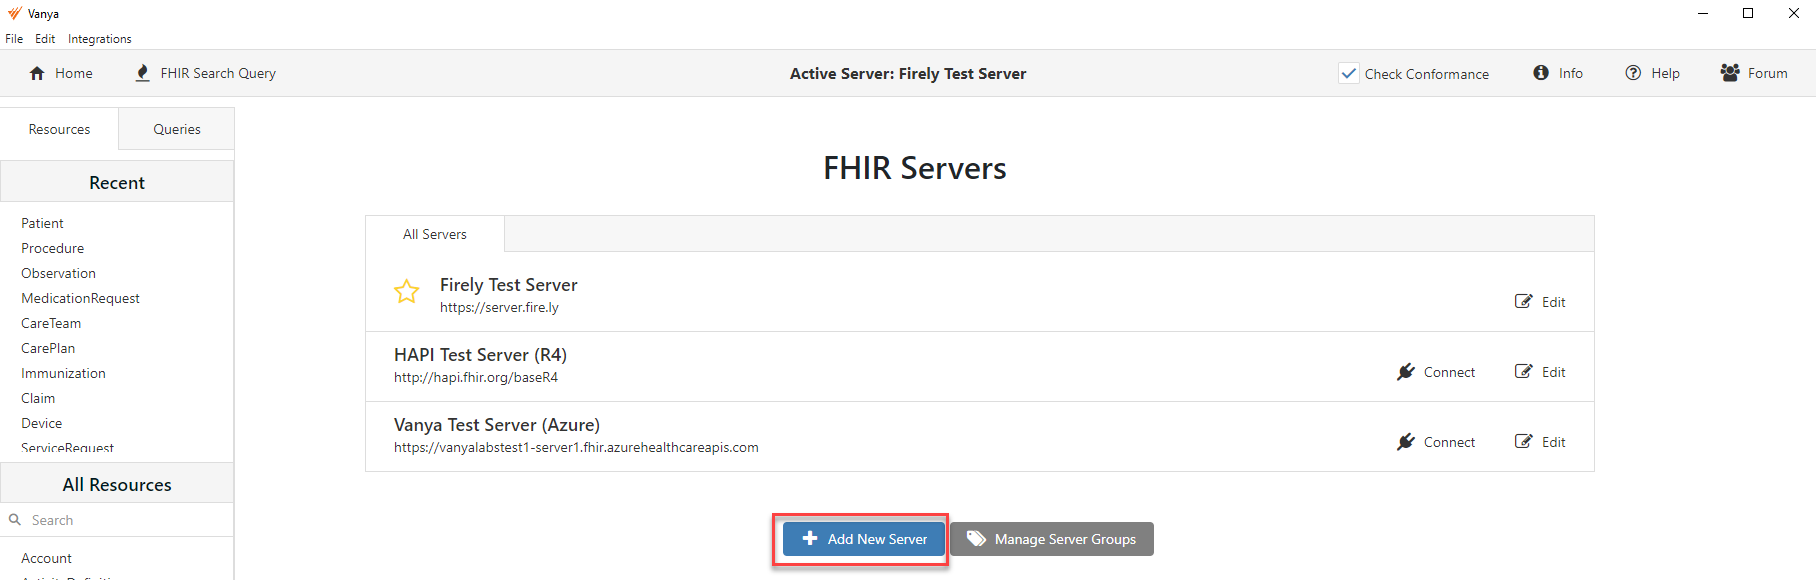
If you’re unsure how to do this, follow the steps outlined for Postman here. Once you’ve done this, click on the Add New Server button on Vanya’s Home page.
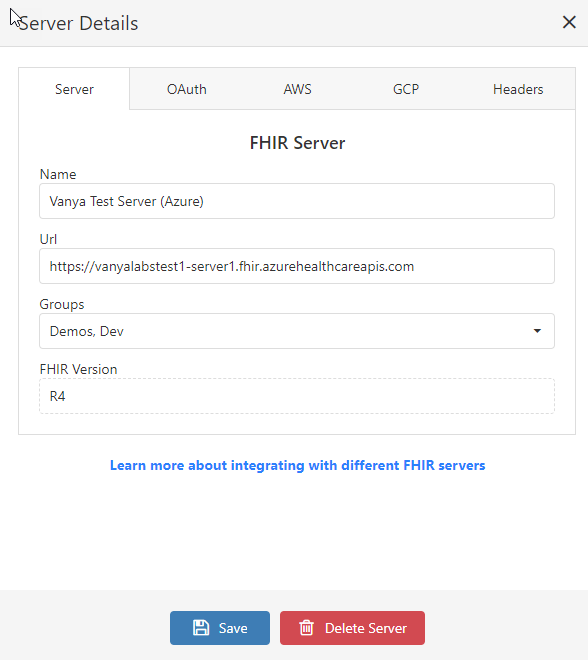
Vanya’s test server is hosted on Azure, so I’ve used some of its settings as an example. In the Server Details popup dialog, give the new server a name: “Vanya Test Server (Azure)”. Copy the base URL for the Azure FHIR server into the URL input box. For our test server it’s https://vanyalabstest1-server1.fhir.azurehealthcareapis.com. Yours will be different.
Next, copy the Client Id and Client Secret you acquired earlier into the inputs on the OAuth Authentication tab. Set the Token Endpoint to https://login.microsoftonline.com/TENANT-ID/oauth2/token, where TENANT-ID is your Azure tenant id. And set the Grant Type to client_credentials.
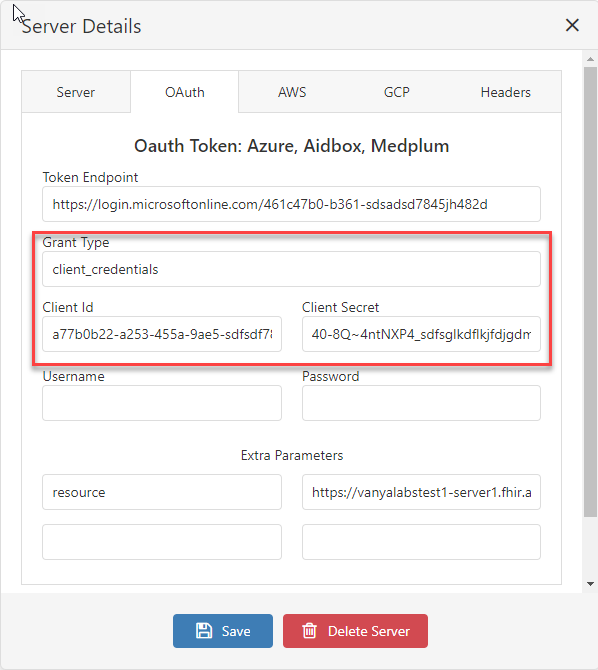
Azure FHIR servers require you to pass the resource URL to the token endpoint. In our case, this was the same as the FHIR server URL, but this is not always the case. Copy your resource URL into the first Extra Parameters field as a key/value pair: resource / url.
Save the changes to exit the dialog, then click Connect next to the Azure server name. If a failure message appears, go back and look at all the values you’ve entered, and refer back to your Azure client application values to ensure everything is correct.