Health Samurai Aidbox
Configuring Oauth2 authentication for Health Samurai Aidbox is very straight forwards. Log into your Aidbox account and navigate to your project’s Sandbox. Under the Client Credentials flow create a value for Client Id and Client Secret. I used "vanya" as the client id for my test project.
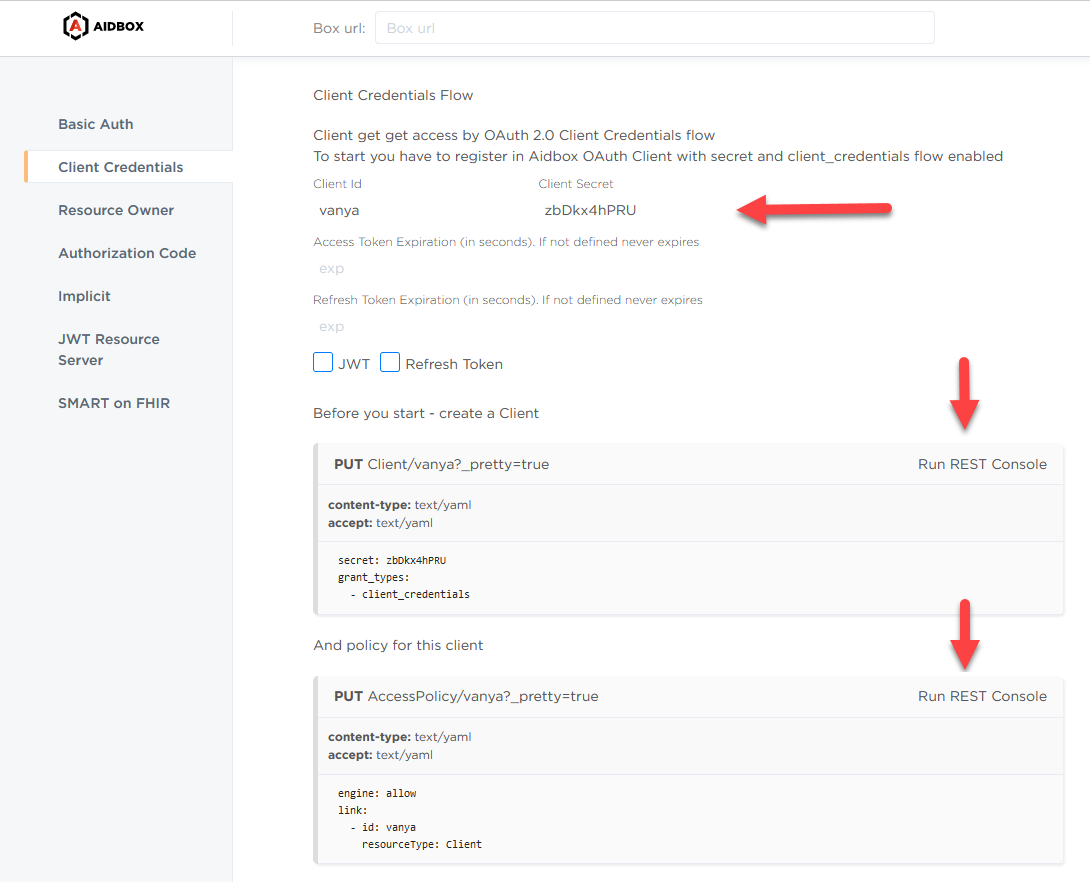
Run the console for "create a client" and "Add policy for this client" as highlighted above. Your credentials are now active. Open Vanya and click the "Add New Server" button on the home screen.
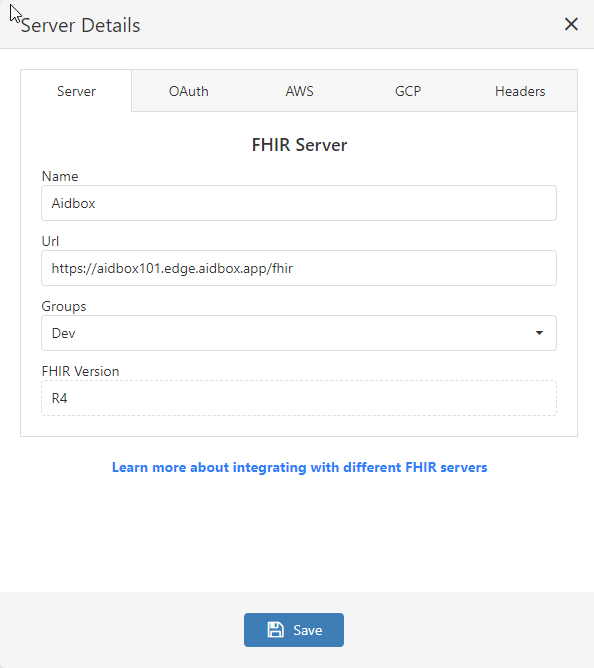
Give the new server a name and set the Url to https://YOUR-SERVER-URL/fhir, where YOUR-SERVER-URL is your Aidbox FHIR server address. It’s important to add the "/fhir" to the end of the server address, otherwise results will not format correctly.
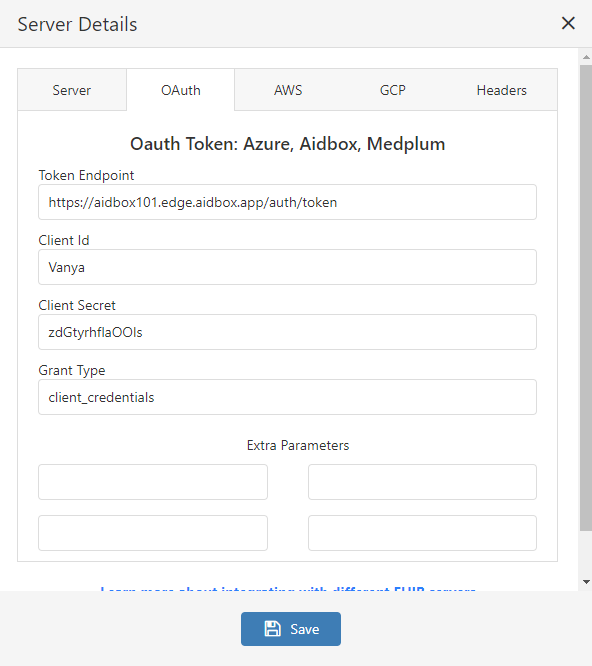
Next, copy the Client Id and Client Secret you acquired earlier into the inputs on the OAuth 2 Authentication tab in Vanya. Set the Token Endpoint to https://YOUR-SERVER-URL/auth/token, where YOUR-SERVER-URL is the FHIR server address in Aidbox. And set the Grant Type to client_credentials.
Save the changes to exit the dialog, then click Connect next to the Aidbox server name. If a failure message appears, go back and look at all the values you’ve entered, and refer back to your Aidbox client application values to ensure everything is correct.