Getting Started with Vanya
Download and install the Vanya desktop app
Version 0.8.1 of Vanya was released on 21st February 2024. Windows and Mac downloads are available.
System requirements are few. We’ve tested the app on all recent versions of Windows and on Intel and ARM Macs. The app is built using Electron and .Net 6. As Electron is resource heavy, you would benefit from a comfortably high spec machine.
Test the connection to one of the default test servers
The start page is simple, showing a list of available servers. The currently connected server will have a yellow star to the left. To connect to a different server, click the connect button.

There are two test servers configured for use. The first is a Fhir.org test server called "HAPI Test Server (R4)" that is used by devs all around the world to test their code. It contains millions of resources created by users as they built their own apps. Much of this data is 'junk data', so be wary when using it.
The second is a server on Azure that we manage called "Vanya Labs Test Server". It's populated with Patient test data generated by Syntea and hosted by Mitre. It's incomplete but we’re growing it slowly.
Both of these servers provide a good testing ground to get a feel for Vanya before trying it out on your own FHIR servers and your own data.
If you click the Add New Server button on the same page, a dialog pops up allowing you to enter server details. If the server is publically accessible without authorization, simply enter the server name and url.
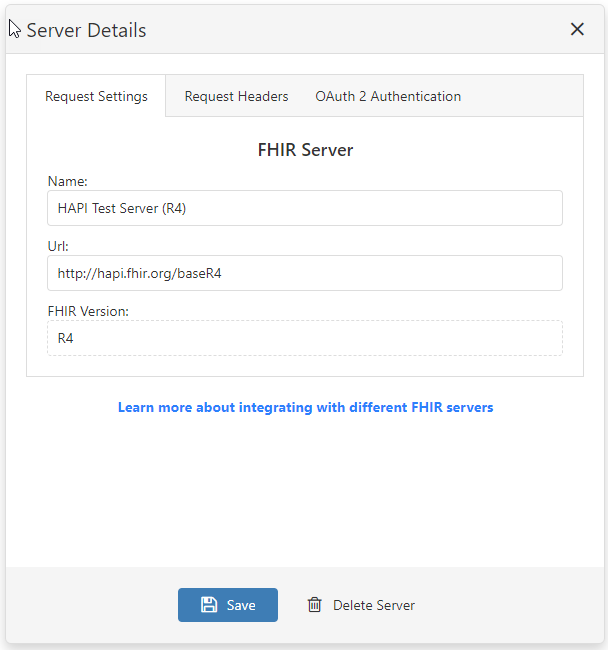
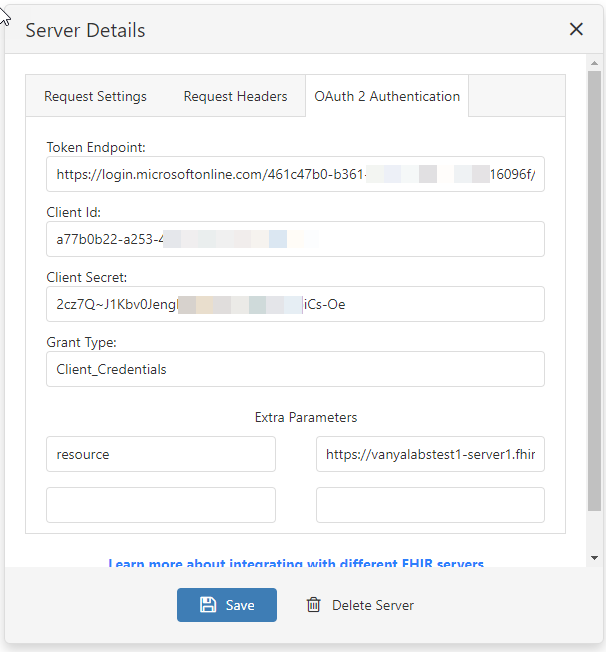
A server that requires OAuth 2 authentication using a bearer token can be configured by populating the “OAuth 2 Authentication” details tab.
The "Request Headers" page allows you to specify up to 5 custom headers to form part of the server request.
Click on a Resource and browse the results
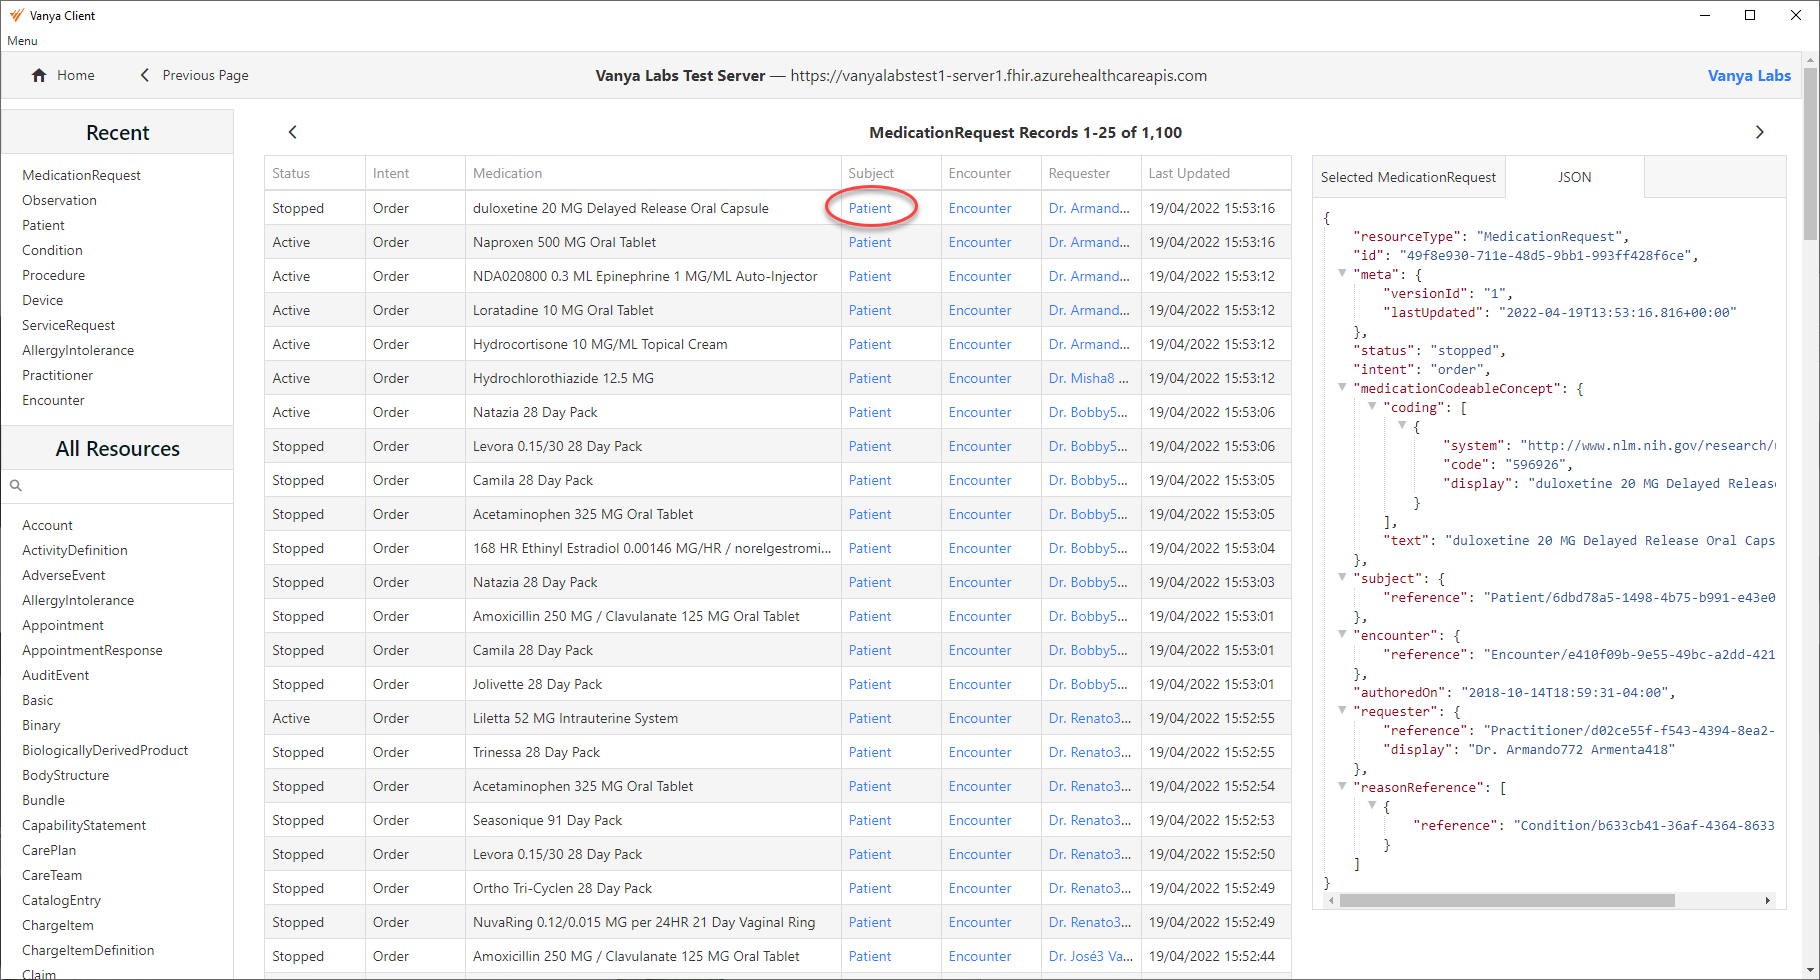
As an example, click on the MedicationRequest link in the sidebar of Vanya. You should see data for the first 25 results, sorted by last updated date, as well as links at the top of the page to browse to the next 25 results.
The Previous Page button will always return you to the previously cached page of results, so you can jump around between Resources, drill down into the data and easily return to the initial results set you were looking at.
Not all fields and data for each resource appear in the results grid. We’re currently only showing some of the most common fields. The data displayed will be expanded on in future releases.
Results are sorted by last updated date, which means you'll always see the most recently updated resources at the top.
Click on any row to populate the full data display for that resource. This contains every value for the resource, inlcuding all extensions, identifiers and references. The 'Selected' tab displays the data in a user friendly way — ideal for demos or if you want a quick look. The JSON tab displays the raw JSON for the complete resource.
A word of caution. The data in the FHIR.org test server is not good and often contains links that do not have corresponding resources. This means you will often see blank resources for linked Resources. You may also encounter error messages when the format of the data is incorrect, leading to pages of results not loading. A common example is incorrectly formatted dates or invalid data in Enumerated value fields.
This is the nature of the beast when dealing with test data servers, and in theory should not happen with production data. We’ll be expanding on the error management and handling in future releases.
Click on some Resource links
Resource links are clickable if we’re handling that particular Resource. At the moment we’re only handling 100 FHIR Resources out of 140+. We’ll improve on this over the next couple of months.
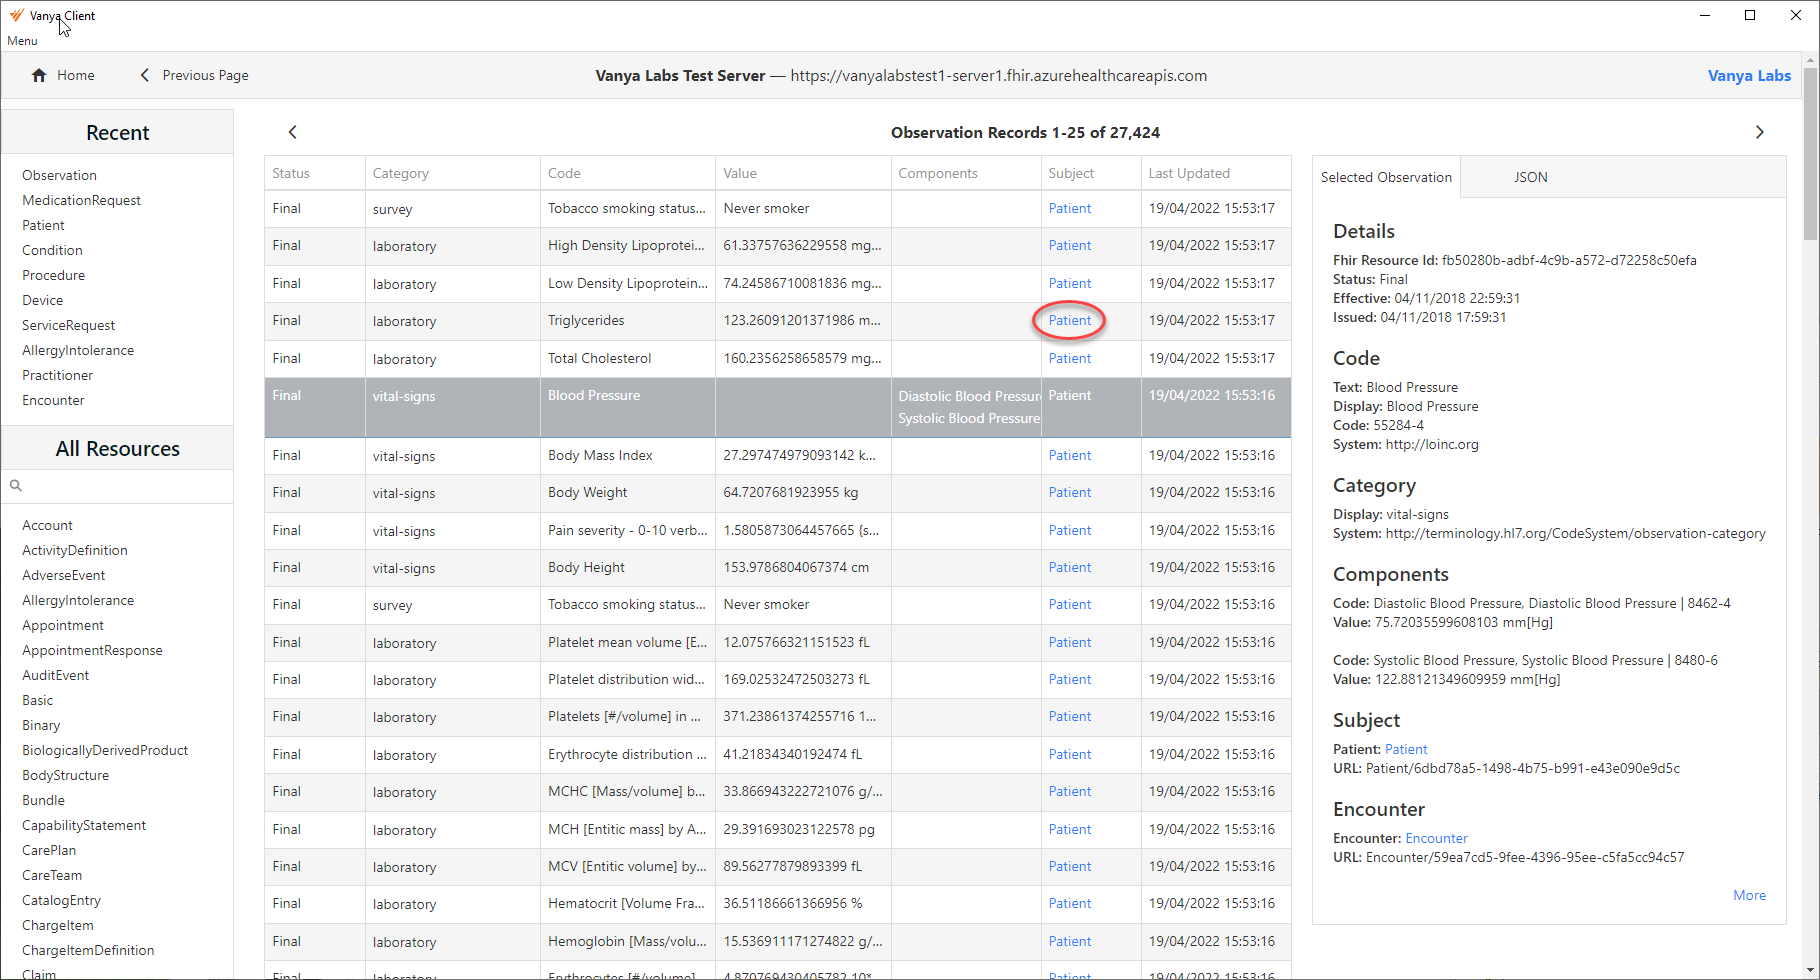
In the above screenshot, clicking on the highlighted Subject will open a new results page with data for that patient. Resource links may or may not show the name of the entity.
If the user who created the data filled the Display value for the resource with a name, that value will be shown, otherwise we default to showing the Resource type, as shown in the above screenshot for some of the other patients.
Now try accessing your own test server
Go back to the home page of Vanya, click the "Add New Server" button and configure your own server.
Depending on how your server is handling access, you may or may not be able to connect. We'll be updating the server connection options over time to handle different server types.
You should always be able to reach a local test server hosted on localhost. If you're unsure how to set that up, here are details on how to run a FHIR R4 server inside a Docker container on your local machine.
Once it's installed and running, add a new server in Vanya and point it to http://localhost:8080/ or whichever port you have it running on.
Click on the Patient resource or on any other resource on the left and start looking at your own data.
Feedback is welcome. Please let us know what you think of the app, what works for you and what doesn’t, and what you’d like to see it do.